
Ceiling Capillary Tube System General Installation Procedure
The capillary tube mats are plastered underneath a suspended gypsum board ceiling.
3/6/20261 min read
Ceiling Capillary Tube System Installation Procedure
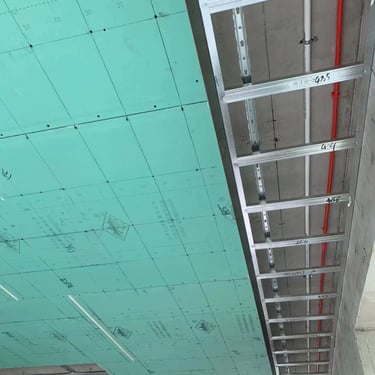
Install Metal Profiles
First, install the metal framework (including load-bearing profiles and support profiles) under the concrete ceiling to provide a stable structure for fixing gypsum boards and subsequent installation. Reserve expansion pipes for fixing chucks on the concrete ceiling and wall surfaces. The spacing shall comply with design requirements, typically 400×400 mm.
Install Secondary Joists
Install matching secondary joists on the installed metal framework in accordance with design drawings, with spacing controlled within 300 mm to provide support points for fixing the capillary tube mats.
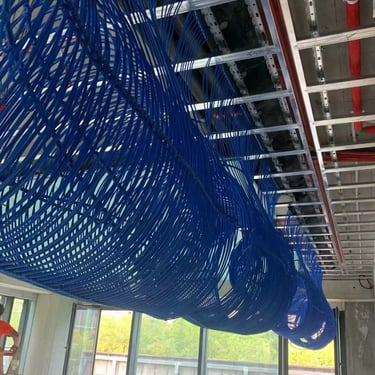
Install Main Pipes of Capillary Tube Mats
Place the main pipes of the capillary tube mats into pre-cut slots in the metal framework (inside the gypsum board panels) to ensure the main pipes are fully concealed and not exposed. The main pipes shall be connected by thermal fusion, and the quality of fusion welding shall be inspected point by point.
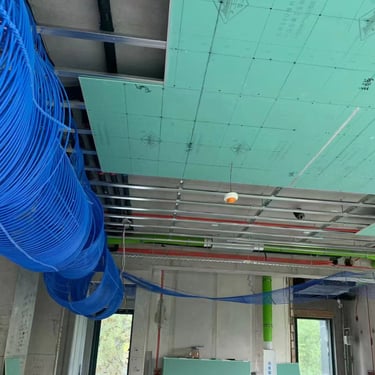
Fix Gypsum Boards
Install and fix gypsum board panels onto the metal framework to form a flat and stable base for laying capillary tube mats. Pay attention to the spacing and depth of screws; avoid excessive sinking, do not damage the paper surface, and perform anti-cracking treatment at board joints.
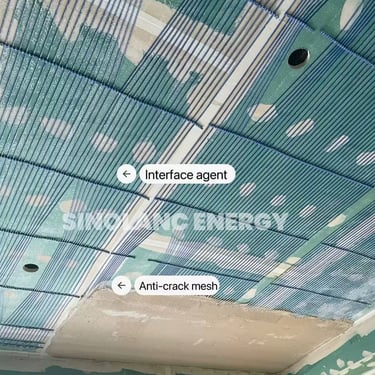
Apply Interface Agent
Apply interface agent evenly on the surface of gypsum boards to enhance the adhesion between capillary tube mats and the subsequent plaster layer, and prevent detachment or hollowing.
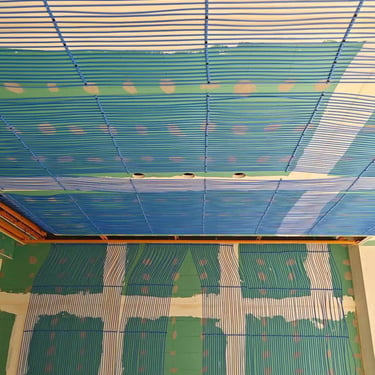
Lay Capillary Tube Mats
Starting from the part of the capillary tube mats extending out of the gypsum boards, adjust the positioning clips of the capillary branch pipes one by one. Fix the positioning clips to the gypsum boards with self-tapping screws, ensuring the clips are flat and tightly attached without warping or arching.
First Plastering and Leveling
Apply the first layer of plaster to fully cover the capillary tube mats, then level the entire surface with a screed to ensure a smooth base.
Install Anti-Crack Fiberglass Mesh
During the second plastering, embed fiberglass reinforcement mesh into the unset plaster layer to prevent surface cracking and improve structural stability and long-term performance.
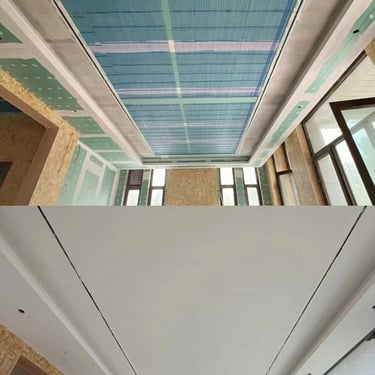
Complete Plaster Layer Construction
Apply the final plaster layer (or cement-based material) with a total thickness of 10–15 mm to ensure the capillary tube mats are fully encapsulated. After overall leveling, apply putty and latex paint to complete the surface construction.
(Installation of capillary tube mats involves many technical details. To ensure a successful and proper installation and operation, please contact us for more details or additional installation instructions.)
CONTACTS
P: +86 18920696269
E: [email protected]
ADDRESS
Sales Office : Floor 1-2 Henghua Building, Dagu South Street, Hexi District, Tianjin
Factory: No.6 Innovation Technology Park, Dongli District, Tianjin, China
Copyright © 2026 SINOLANC ENERGY